

Installing a board sander machine can seem like a daunting task, but with the right guidance and a systematic approach, it can be a straightforward process. As a supplier of high - quality board sander machines, I'm here to share a detailed guide on how to install one.
Pre - installation Preparations
Before you even unpack the board sander machine, there are several crucial steps to take. First, select an appropriate location for the machine. The area should be well - ventilated to prevent the accumulation of dust generated during the sanding process. It should also have a stable, level floor to ensure the machine operates smoothly. Uneven surfaces can cause vibrations, which may not only affect the quality of sanding but also lead to premature wear and tear of the machine.
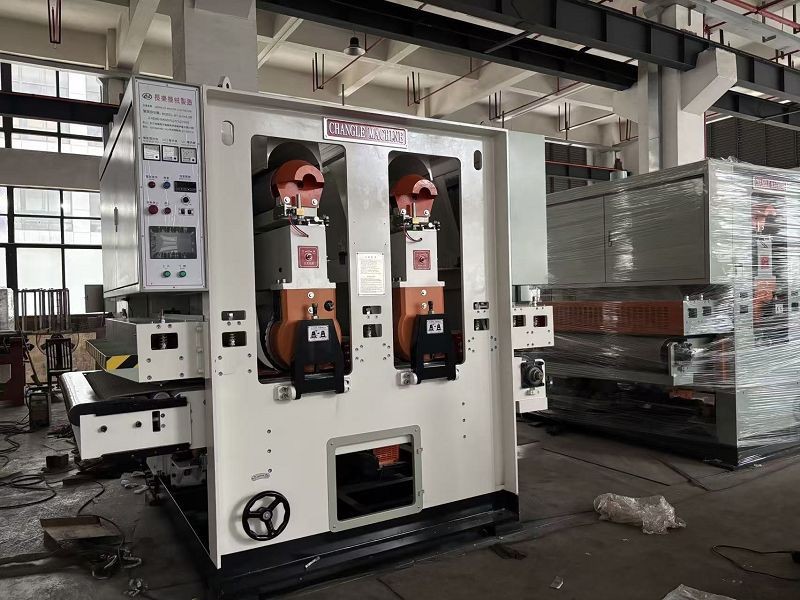
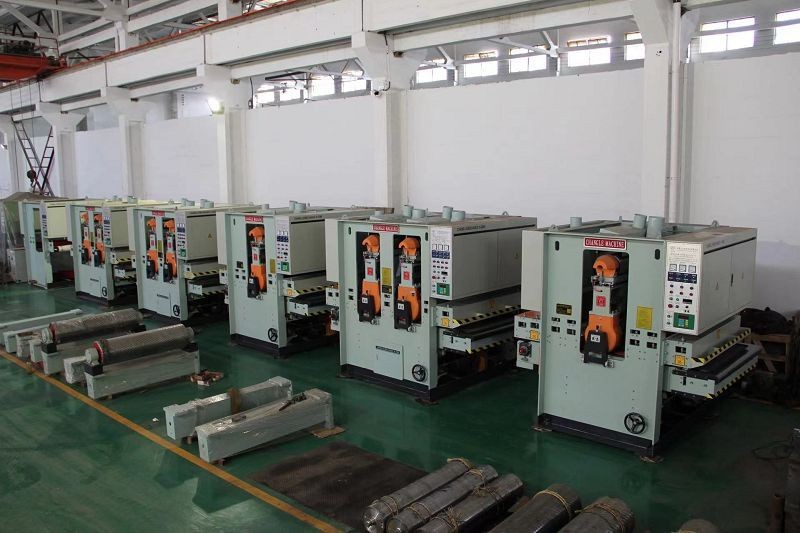
Measure the space where you plan to install the machine. Make sure there is enough clearance around it for easy access during operation and maintenance. You'll need space to open the doors of the machine, if it has any, and to move materials in and out. Also, ensure that there are no obstacles such as pipes, electrical wires, or other equipment that could interfere with the installation or operation of the board sander.
Check the electrical requirements of the machine. Most board sander machines require a specific voltage and amperage. Consult the user manual to determine the exact electrical specifications. You may need to have a dedicated electrical circuit installed by a qualified electrician to ensure safe and reliable operation.
Unpacking and Inspection
Once you've prepared the installation area, carefully unpack the board sander machine. Inspect all the components for any signs of damage during transit. Look for scratches, dents, or loose parts. If you find any damage, contact the supplier immediately. Most suppliers, including us, offer warranties and support to handle such situations.
As you unpack, lay out all the components in an organized manner. This will make it easier to identify each part during the installation process. Refer to the installation manual that comes with the machine. The manual usually contains a list of all the components and a diagram showing how they fit together.
Assembly
The assembly process may vary depending on the type and model of the board sander machine. However, there are some general steps that are common to most machines.
Base Installation
Start by installing the base of the machine. The base provides stability and support for the entire unit. Place the base on the pre - prepared level surface and secure it using the appropriate bolts or fasteners. Make sure the base is firmly attached to the floor to prevent any movement during operation.
Motor and Drive System Installation
Next, install the motor and the drive system. The motor is the power source of the board sander, and the drive system transfers the power to the sanding belts or drums. Carefully align the motor with the drive system according to the instructions in the manual. Connect the electrical wires following the wiring diagram provided. Ensure that all connections are tight and secure to avoid electrical hazards.
Sanding Unit Installation
Install the sanding unit, which includes the sanding belts or drums. This is a critical part of the machine as it directly affects the sanding performance. Follow the instructions to properly mount the sanding belts or drums. Make sure they are tensioned correctly. Over - tensioning can cause premature wear of the belts or drums, while under - tensioning can result in poor sanding quality.
Control Panel Installation
The control panel allows you to operate the machine and adjust various settings. Install the control panel in a convenient location where you can easily access it during operation. Connect the control panel to the main electrical system and the motor according to the wiring diagram.
Alignment and Calibration
After the assembly is complete, it's time to align and calibrate the machine. Proper alignment ensures that the sanding belts or drums are parallel to the work surface and to each other. This is essential for achieving uniform sanding results.
Use a straightedge or a laser alignment tool to check the alignment of the sanding unit. Adjust the position of the belts or drums as needed. Calibrate the machine to set the correct sanding pressure, speed, and other parameters. Refer to the user manual for the specific calibration procedures for your machine.
Testing
Before using the board sander machine for actual sanding, it's important to conduct a test run. Turn on the machine and let it run for a few minutes without any material on the work surface. Listen for any unusual noises or vibrations. Check the operation of the control panel and make sure all the functions are working properly.
If everything seems normal, place a small piece of scrap material on the work surface and start the sanding process. Observe the sanding quality and make any necessary adjustments to the settings.
Safety Considerations
During the installation and operation of the board sander machine, safety should be your top priority. Wear appropriate personal protective equipment (PPE), such as safety glasses, ear protection, and a dust mask. Make sure the machine is properly grounded to prevent electrical shocks.
Keep the work area clean and free of debris. Regularly clean the dust collection system to prevent the accumulation of dust, which can be a fire hazard. Follow all the safety instructions in the user manual.
Types of Board Sander Machines
There are different types of board sander machines available in the market, each with its own features and applications.
Three Head Sander
The Three Head Sander is a versatile machine that can handle a wide range of sanding tasks. It has three sanding heads, which can be adjusted independently to achieve different sanding results. This type of machine is suitable for large - scale production and can sand multiple boards simultaneously.
Sanding Machine Flip - Board Production Line
The Sanding Machine Flip - Board Production Line is designed for high - volume production. It can automatically flip the boards during the sanding process, ensuring that both sides of the boards are sanded evenly. This type of production line is commonly used in the furniture manufacturing industry.
Double Head Sanding Machine
The Double Head Sanding Machine is a popular choice for medium - sized woodworking shops. It has two sanding heads, which can provide a more efficient sanding process compared to single - head machines.
Conclusion
Installing a board sander machine requires careful planning, proper assembly, alignment, and calibration. By following the steps outlined in this guide, you can ensure a successful installation and optimal performance of the machine.
If you're in the market for a high - quality board sander machine, we are here to help. Our team of experts can provide you with detailed information about our products and assist you with the installation process. Contact us to discuss your specific requirements and start a procurement negotiation. We look forward to working with you to meet your sanding needs.
References
- Manufacturer's Installation and User Manuals
- Woodworking Industry Standards and Guidelines


